To create your account in Websa you may proceed in two ways as follows:
- Use your direct email and password
- Use your social account
Start creating your account via your email and password (Step 1 of 2)
To start creating your account via your email you shall set up your user data as follows at first
- Your first name
- Your last name
- Your email
- Your password
Here, you must agree with our Terms of Services and Privacy Policy to be able to use an account. You may also optionally agree to receive news and offers from the company as follows


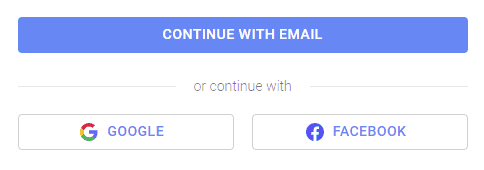
Then you may click Continue with email button to confirm your email address by opening a confirmation link sent in a confirmation email to your email address. After your email confirmation, you shall proceed to step 2 to set up your account settings.
Start creating your account via your social account (Step 1 of 2)
Another way to start creating your account is using your social account. To begin, you shall click a social account button Google or Facebook to proceed

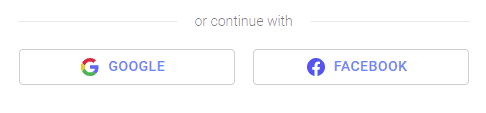
Here, you shall accept a social net request to proceed to step 2 to set up your account settings.
Setup your account settings (Step 2 of 2)
At this stage, you shall choose your account type, either personal or company

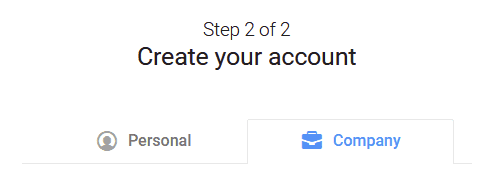
To know the difference between these types, please read this chapter
Here, you shall fill your account name, either your personal account name or your company name. Also, you must enter your location. To know the importance of your location, please read this chapter
Also, you may optionally enter your Tax ID here. To know why your account Tax ID is important, please read this chapter
Then press Create account button to proceed. Now, your account is created as well as your user profile. To know what is your account and your user profile please read this chapter
Now, you will see the welcome page of Websa services as follows

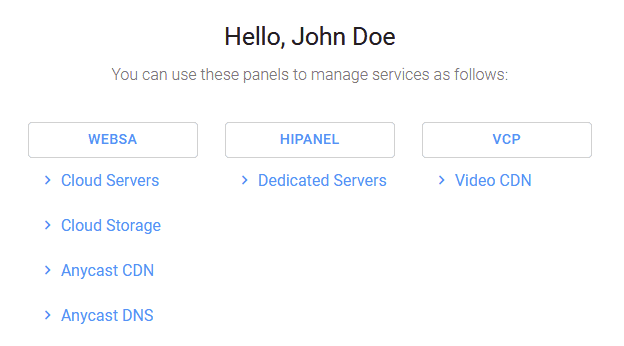
Congratulations, you’re all set!